Transformational Gardening
October 2010 Foraging Experiences
(Back to:
September 2010 Foraging Experiences)
(Forward to:
November 2010 Foraging Experiences)
October 1, 2010
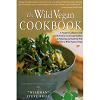 I receive a fantastic gift from my friends Mike and Judy. They gave me the following
book:
The Wild Vegan Cookbook: A Forarger’s Culinary Guide (in the Field or in the
Supermarket) to Preparing and Savoring Wild (and Not So Wild) Natural Foods
by “Wildman” Steve Brill
October 2, 2010
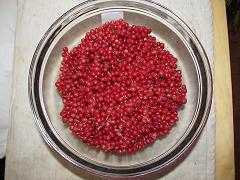
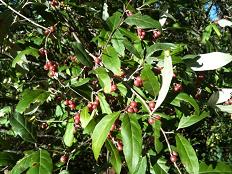 Picked 5 cups of Autumn Olive berries today. Learned a lot about picking them.
Tried to roll the berries off the stems to avoid getting the berries with stems
attached. It is easier using two hands and doing this process on berries at chest height.
But if you have to reach way up for most of the berries, it is very hard to get them
without the stems and keep them from dropping on the ground. Better to get these on a
step ladder or chair. It is slow and messy to pick through the berries afterwards to get
rid of the stems, so better to do a clean job while picking.

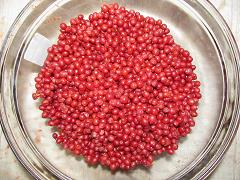 Then I decided to make Autumn Olive berry jam! Never made jam before. First, I had
to decide if I wanted to grind up the pits and mix them in as they contain healthy
Omega-3 fatty acids. But I decided to remove them using a $39 hand-crank food mill
(Endurance brand). By reading up on canning online, I learned that it is important
to have all of the kitchen equipment and ingredients laid out and ready to use.
I ended up making the jam twice. The first time it came out way too watery, so I
opened up the sealed jars and tried again. Below, I will detail the tools and
ingredients I used for the final recipe and then detail what I did wrong the first time.
Kitchen Equipment
- Endurance brand hand-crank food mill
- 4, 1-cup canning jars (had 6 ready in case I needed them)
- Tongs to lift the jars out of the boiling water
- 20 quart Krona stainless steel pot with lid (smaller pot could have been used)
- Canning rack at bottom of pot (to keep the jars separated from each other)
- Bowls for puree
- Pot holders
Ingredients
- 2-1/2 cups of Autumn Olive berry puree (from 5 cups of Autumn Olive berries)
- 1/2 cup of Apple Juice
- 1/2 cup of raw Wildflower Honey
- 9 Tablespoons of Agar Agar Flakes
- 2 Tablespoons of Lemon Juice
After running the Autumn Olive berries through the food mill to remove the pits,
I slowly heated the puree on the stove. At the same time, I warmed the closed
canning bottles in a pot under low temperature. This insures that the bottles
stay hot and sterile from before the jam is added until the canning is complete.
I added the Apple Juice, Wildflower Honey, Lemon Juice and then added 2 Tablespoons
of Agar Agar Flakes as a thickener. Here is where I made my first mistake. I should
have added much more Agar Agar. It gels after it cools in the refrigerator and I
didn’t know until the next day that with only 2 Tablespoons of Agar Agar, the jam
would not gel. After adding the Agar Agar and stiring and heating slowly until
nearly a boil, I pulled the jars from the hot water, opened them up and carefully
added the heated jam to about 1/2 inch from the top. I wiped the sides and edges,
sealed the jars and then added them to the heated water in the 20 quart pan.
Brought water to a boil and let it boil for 5 minutes with the jars covered
with water. Turned the burner off, let cool, removed from water a couple hours
later and then refrigerated so the Agar Agar could gel.
One of the mistakes was to add only 2 Tablespoons of Agar Agar. Probably would work will
for at least 6 Tablespoons for every 2-1/2 cups of puree (or approximately 3-1/2 cups
after adding all of the other ingredients). I ended up using 9 Tablespoons of Agar Agar.
Another mistake is that I probably did not need the Apple Juice. Once you start heating
the Autumn Olive berry puree, it becomes more watery and no other liquids will need to
be added. I probably could have gotten away with 1/4 cup of Wildflower Honey. If you
pick the berries too early, they tend to be very tart and may need more sweetener. I
picked the berries a week after I tasted tart ones and these were very sweet and only
slightly tart. Finally, the Agar Agar is fairly expensive, but worth a try. I may try
using Kudzu next time. I am glad I went the natural route and mostly used products
that could be harvested locally.
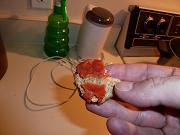
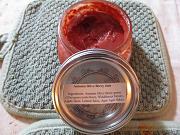
Below is a picture of the finished product after I started munching on this
very tasty jam!
October 3, 2010

October 9, 2010
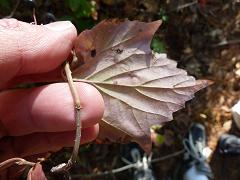
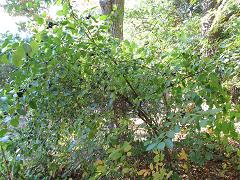
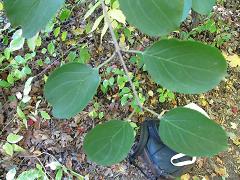
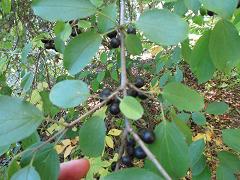
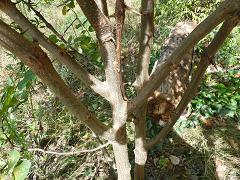
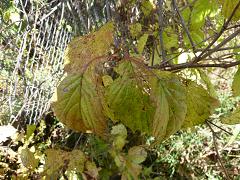
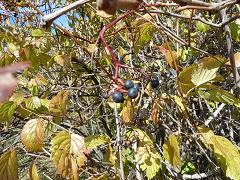
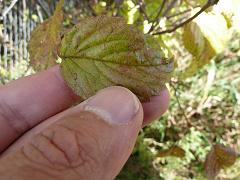
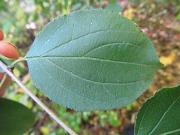
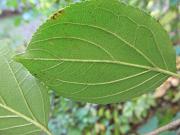
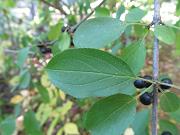
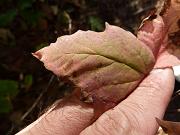
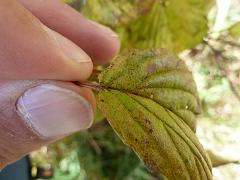
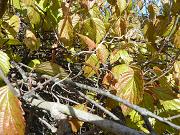
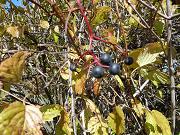
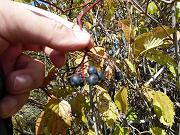
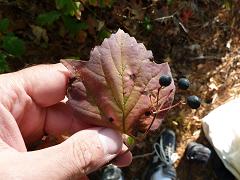 I came across this Mapleleaf Viburnum on a walk this afternoon. I was lucky that the
fruits were still showing or I probably would have mistaken it for a young maple tree.
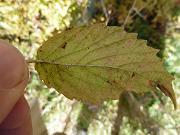
Mapleleaf Viburnum is a 3-6 foot tall shrub with maple-like leaves (3 lobes). The leaves are
arranged opposite of each other. The tops of the leaves, edges of the leaves and
especially the twigs are hairy. The backs of the leaves have tiny black dots.
In the Spring, the plant produces a flat-topped cluster of white flowers (not shown:
see here).
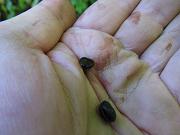
In the Fall, purple-black berries (drupes) are produced. These berries have a single
seed. According to Steve Brill, these berries are unpalitable and inedible.

 There are two other species of Viburnums in New Hampshire that have maple-like
leaves: Squashberry (Viburnum edule) which has red berries, occurs at
higher elevations in the Northern part of the state and has only slightly lobed
leaves; and European Cranberrybush (Viburnum opulus) which has red berries and
glands near the top of the petiole (leaf stalk) (unlike the Mapleleaf Viburnum).
This web page at Cornell University is helpful in differentiating between
Viburnum species:
Which Viburnum is it?
Not all Viburnums have stipules (fang-like appendages) at the base of the leaves.
But the Viburnums with maple-like leaves have stipules. You can see the thin
whitish stipules next to the buds in the first picture above on the left if you
click on it to expand and click on it again to expand it further. If it did
not have stipules, it would most likely be a young maple tree.
October 10, 2010
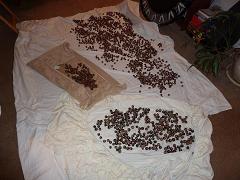 Picked 2-1/2 gallons of acorns today. The first 1-1/2 gallons appear to be
small, White Oak (Quercus alba) acorns. I would like to get at least
10 gallons before the end of the Fall. As you can see, I do not have drying
trays yet. Off to the store tomorrow.
October 11, 2010
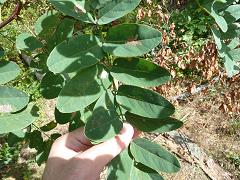
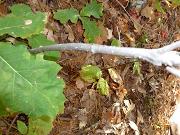
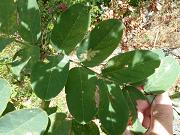
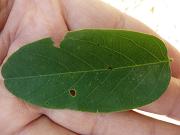
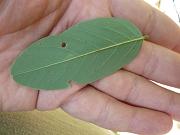
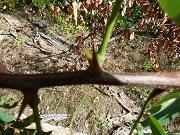
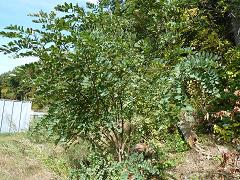 On the bike trail looking for acorns, I came across a group of small Black Locust
trees. Black Locust has black-tinted bark, the leaves are arranged alternately
on the stem with each leaf having many large, oval untoothed leaflets (pinnately-compund). At the base of each leaf are two very sharp thorns.
The leaf stem (petiole) is swollen where it attaches to the branch (between the
thorns). The thorns are prominent on young trees and apparently are not prominent
on older, larger trees. In the Spring, the Black Locust will produce white,
pea-like flowers.
 There are two other Robinia species in New Hampshire:
- Bristly Locust (Rose Acacia) (Robinia hispida): Similar to Black Locust but
has very long, red hairs on stems and has a pink-colored, pea-like flower.
- Clammy Locust (Rose Acacia) (Robinia viscosa): Similar to Black Locust but
has the braches are covered with numerous, sticky short-stalked red glands and has a
pink-colored, pea-like flower.
In addition, the Black locust has similarity to the Honey Locust
(Gleditsia triacanthos). It is once or twice pinnately compound leaves.
The leaflets are not nearly as broad as the Black Locust leaflets. The Honey
Locust has numerous, sharp 3-part or multi-part branched thorns.
The Black Locust tree is prized for firewood (extremely dense wood), fence posts
(resistant to moisture and rot), furniture (low rate of expansion/contraction),
hardwood floors, support timbers (great structural strength).
While most of the plant, including the bark is considered toxic, the flowers
have been traditionally used for tea to treat rheumatism and can also be used
in making jam and pancakes. Small doses of the bark are considered a tonic by some,
while larger doses of the bark are considered emetic and purgative. More information
on the uses of Black Locust can be found in the
Plants for a Future database and
Henriette's Herbal web page.
October 11, 2010
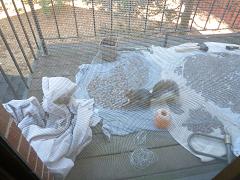 Drying 2-1/2 gallons of acorns on my balcony. For the first hour, a squirrel was
winning the battle of the acorns. It would reach under the screen I laid down over
the acorns and grab it to take it home and then come back for more. Now that I have
the edges of the screen weighed down, it’s just slobbering over the acorns.
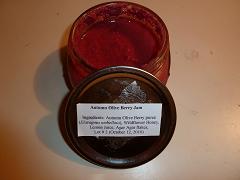 Made more Autumn Olive jam. This time I used way too much money. I used 3/4th of a cup
of Wildflower Honey for 3 cups of Autumn Olive puree. In the future, I should use an
absolute maximum of 1/2 cup of honey per 3 cups of puree. Also, the jam did not solidify
as well as last time (October 2, 2010) even though I used 9 Tablespoons of Agar Agar.
It might be because I did not add Apple Juice this time. Or perhaps it was because
I used too much honey? Or maybe I just needed a bit more Agar Agar since I had
1/2 cup more of puree this time.
October 14, 2010
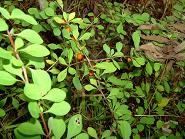
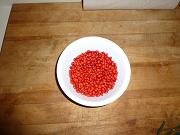
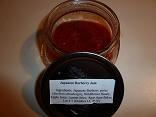
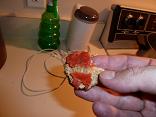
Picked 1-1/2 cups of Japanese Barberry berries. I waited way too long to
pick them. Should have done it 3 weeks ago. There were many fewer berries
available (animals probably got them) and the quality was poor. Even with
a decent amount of honey and apple juice the taste is: yuck! Next year I
will catch the berries earlier. (Note: The first picture on the left below
is from September 16, 2010.)
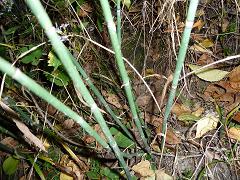
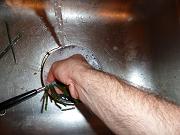
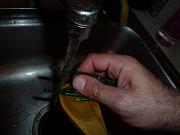
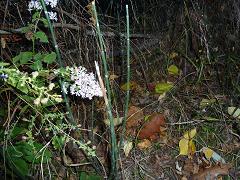 Picked Scouringrush Horsetail to use as a pot and pan scrubber. The silica crystals
in the stem were traditionally used for scouring. I tried it on dirty pots, a wooden
spoon and glass bowls and it worked extremely well and it kept working without any
loss of scrubbing capability.
I saved some Scouringrush Horsetail so I can lash it together and try to make a
more stable “scouring pad.” Also, I want to repeatedly reuse the stems
to see how long they last.
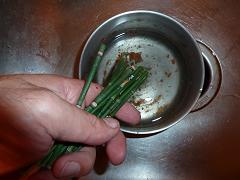
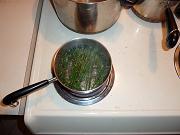
 In Japan, the stems are boiled and then used as fine sandpaper to finish furniture
and other workworking projects. Reportedly, the Scouring Rush Horsetail works better
than fine sandpaper to provide a smooth finish. I boiled up the stems, but I don’t
know what to do with them next. I’ll try letting them dry, lashing them together
(or perhaps cutting them into flatter pieces) and then using on a piece of red oak that
I recently finished with natural stain and resin.
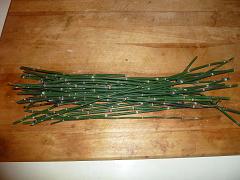
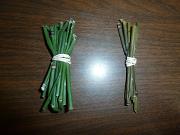
The picture on the lower right shows two bundles of Scouringrush Horsetail. The bundle
on the left was used for washing dishes, especially pots/pans. The bundle on the right
was in boiling water for 20 minutes and then dried for a day. I used it as fine sandpaper
on a piece of finished wood.
Whole Wheat Sourdough Bread
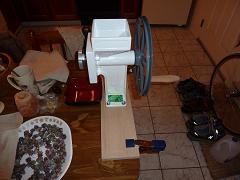 I got my Country Life Grain Mill in a week ago and have been using it.
It does build up the muscles making flour from a hand-crank grain mill.
The first time I used it I did not have a way to clamp it down and it
was amazingly difficult to hold the mill with one hand and grind with
the other. As you can see from the picture, I built a base from a piece
of oak, drilled holes and attached the base to the grain mill with carriage
bolts. Then I can clamp the ends of the base to a table for stability. I
got the idea for a base from a
Youtube video I saw.
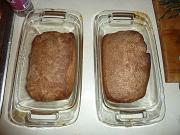
I made two loaves of bread, one with honey and one with maple syrup. The
ingredients for one loaf is as follows:
- 2-3/4 cups hard Spring wheat flour (freshly ground)
- 3/4 cup sourdough (made by mixing 1-1/2 cups whole wheat flour, 1 cup spring
water, and a little packet of yeast and letting sit out at room temperature overnight)
- 7/8 cup water (approximate)
- 1 teaspoon sea salt
- 2 tablespoons olive oil
- 2 tablespoons sweetener (honey or maple syrup)
The sourdough helps deactivate the phytic acid in the wheat so that it does
not bind with minerals in our body and cause poor health over time.
I mixed the ingredients, kneeded the bread for about 6-8 minutes and let it
rise for 5 hours. Then I punched it back down and kneeded it again for a while.
I let the bread rise for another 2 hours. Then I punched it down and molded it
into a glass bread pan that had been oiled with olive oil. Baked at 350 degrees
Farenheit for 60 minutes.
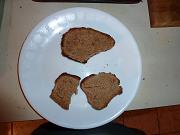
I accidently let it go too long and the crust got too
hard. But the bread tastes very good, especially the one
sweetened (but not oversweetened) with honey.
Next idea is to make wild rice bread. The acorns I have
been picking are not ready to use for bread. They still have to
dry and then I need to open the acorns and leech out the tannins.
October 18, 2010
My friend, Jennifer, made Autumn Olive muffins and they were excellent!
Since the start of October, I have taken pictures of numerous plants, but have
not had the time to identify many them and put them up on the web. Hopefully,
later this week or next week.
I have about 4 gallons of acorns collected and they are in the processing
of drying. I want to get about 15-20 this Fall to last me through the year.
I have collected 150 milkweed stalks and would like to get about 1,000 to use
to practice making cord over the Winter.

 I receive a fantastic gift from my friends Mike and Judy. They gave me the following
book:
 Picked 5 cups of Autumn Olive berries today. Learned a lot about picking them.
Tried to roll the berries off the stems to avoid getting the berries with stems
attached. It is easier using two hands and doing this process on berries at chest height.
But if you have to reach way up for most of the berries, it is very hard to get them
without the stems and keep them from dropping on the ground. Better to get these on a
step ladder or chair. It is slow and messy to pick through the berries afterwards to get
rid of the stems, so better to do a clean job while picking.
 Then I decided to make Autumn Olive berry jam! Never made jam before. First, I had
to decide if I wanted to grind up the pits and mix them in as they contain healthy
Omega-3 fatty acids. But I decided to remove them using a $39 hand-crank food mill
(Endurance brand). By reading up on canning online, I learned that it is important
to have all of the kitchen equipment and ingredients laid out and ready to use.


 I came across this Mapleleaf Viburnum on a walk this afternoon. I was lucky that the
fruits were still showing or I probably would have mistaken it for a young maple tree.
 There are two other species of Viburnums in New Hampshire that have maple-like
leaves: Squashberry (Viburnum edule) which has red berries, occurs at
higher elevations in the Northern part of the state and has only slightly lobed
leaves; and European Cranberrybush (Viburnum opulus) which has red berries and
glands near the top of the petiole (leaf stalk) (unlike the Mapleleaf Viburnum).
This web page at Cornell University is helpful in differentiating between
Viburnum species:
Which Viburnum is it?
 Picked 2-1/2 gallons of acorns today. The first 1-1/2 gallons appear to be
small, White Oak (Quercus alba) acorns. I would like to get at least
10 gallons before the end of the Fall. As you can see, I do not have drying
trays yet. Off to the store tomorrow.
 On the bike trail looking for acorns, I came across a group of small Black Locust
trees. Black Locust has black-tinted bark, the leaves are arranged alternately
on the stem with each leaf having many large, oval untoothed leaflets (pinnately-compund). At the base of each leaf are two very sharp thorns.
The leaf stem (petiole) is swollen where it attaches to the branch (between the
thorns). The thorns are prominent on young trees and apparently are not prominent
on older, larger trees. In the Spring, the Black Locust will produce white,
pea-like flowers.
 There are two other Robinia species in New Hampshire:


 Drying 2-1/2 gallons of acorns on my balcony. For the first hour, a squirrel was
winning the battle of the acorns. It would reach under the screen I laid down over
the acorns and grab it to take it home and then come back for more. Now that I have
the edges of the screen weighed down, it’s just slobbering over the acorns.
 Made more Autumn Olive jam. This time I used way too much money. I used 3/4th of a cup
of Wildflower Honey for 3 cups of Autumn Olive puree. In the future, I should use an
absolute maximum of 1/2 cup of honey per 3 cups of puree. Also, the jam did not solidify
as well as last time (October 2, 2010) even though I used 9 Tablespoons of Agar Agar.
It might be because I did not add Apple Juice this time. Or perhaps it was because
I used too much honey? Or maybe I just needed a bit more Agar Agar since I had
1/2 cup more of puree this time.

 Picked Scouringrush Horsetail to use as a pot and pan scrubber. The silica crystals
in the stem were traditionally used for scouring. I tried it on dirty pots, a wooden
spoon and glass bowls and it worked extremely well and it kept working without any
loss of scrubbing capability.
 In Japan, the stems are boiled and then used as fine sandpaper to finish furniture
and other workworking projects. Reportedly, the Scouring Rush Horsetail works better
than fine sandpaper to provide a smooth finish. I boiled up the stems, but I don’t
know what to do with them next. I’ll try letting them dry, lashing them together
(or perhaps cutting them into flatter pieces) and then using on a piece of red oak that
I recently finished with natural stain and resin.
 I got my Country Life Grain Mill in a week ago and have been using it.
It does build up the muscles making flour from a hand-crank grain mill.
The first time I used it I did not have a way to clamp it down and it
was amazingly difficult to hold the mill with one hand and grind with
the other. As you can see from the picture, I built a base from a piece
of oak, drilled holes and attached the base to the grain mill with carriage
bolts. Then I can clamp the ends of the base to a table for stability. I
got the idea for a base from a
Youtube video I saw.
